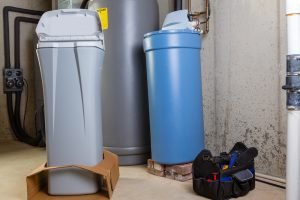
Once you’ve chosen to add a new water softener to your home, there’s some maintenance to consider.
Learning how to clean a water softener resin tank is, thankfully, more accessible than it sounds.
With this guide’s help, you’ll be well on your way to preserving the integrity of your softener.
Table of Contents
Why Should I Clean My Water Softener?
As with any other appliance you have in your household, maintenance is necessary to prolong a water softener’s lifespan.
Considering you will be relying on this unit to help keep minerals out of your home’s water, it will need extra care.
Without proper maintenance, your water softener won’t help to stop calcification of pipes, the buildup of minerals in your plumbing, and more.
The most crucial reason to continually maintain your softener is to help promote its efficiency.
As you use the water in the tank, more minerals build up on the tank’s bed. These minerals can cause less softened water to be produced and pushed through your pipes.
Depending on the type of salt you use, you could also be dealing with the effects of salt mushing and salt bridging.
What Is Salt Mushing?
Salt mushing is something that occurs when the salt at the bottom of your softener tank recrystallizes.
This process forces the material to turn into a sludge-like consistency, which prevents the softener from cycling.
Considering regeneration is what helps to make sure the salt is cleaned correctly, mushing can cause blockages.
The more severe the salt mushing is in your water softener, the harder your water will be. Also, the more damage the softener will experience over time.
What Is Salt Bridging?
Another issue you might have to deal with is salt bridging. This issue presents itself when a crust is created on the inside of the brine tank.
When you have a solid crust in the tank, there’s a significant gap between the water and salt, preventing it from dissolving.
You’ll begin to notice a lack of brine, which means your water will return to its hard consistency.
How Often Do I Clean the Resin Tank?
There isn’t a specific formula or length of time to abide by when it comes to knowing when to clean your resin tank.
Instead, it’s best to keep an eye on the consumption of salt from your machine to know when to conduct maintenance.
Ideally, you’ll want to try cleaning when the salt is low, as it will help to take a lot of struggle out of the process. The less salt there is in the tank, the easier it will be to remove.
It’s best if you’re able to clean the resin tank in between uses. This process allows your new batch of salt to work effortlessly and more efficiently.
Alternatively, you can refer to the instructions that arrived with your water softener, as it will have a pre-arranged schedule.
Typically, when the unit is installed in your home, the technicians will note when your first maintenance should be.
You can also use the instructions to help manage a schedule to ensure you’re able to maintain the unit over your ownership.
There are a few other things to look for that could be a reliable indicator your resin tank needs to be cleaned.
Non-Operational Units
If your water softener has been sitting for an extended period without use, you’ll surely want to clean it.
This point is particularly crucial if you have purchased a previously owned home.
Noticeable Water Changes
If you notice a significant difference in your water’s color once it has been softened, it’s time for a cleaning.
You might also want to consider cleaning the brine tank if your water tastes different from its original flavor.
Different tasting water could often be a sign of a significant amount of minerals remaining in the water.
Contamination
Fortunately, it’s relatively easy to tell if there has been bacterial or microbial contamination in your water softener.
Most homeowners note an egg-like smell that is quite similar to sulfur, which means the tank needs cleaning immediately.
If you’re concerned, there are many bacterial tests you can purchase to show if your water supply is contaminated.
How to Clean a Water Softener Resin Tank
There are two main processes that you can do to clean your resin tank, depending on how deep of a clean you need.
The first method is faster and simpler with the help of a store-bought mineral cleaner, while the second is more hands-on.
Cleaning With a Mineral Cleaner
Step 1: Finding a Cleaner
The cleaner you choose will depend on the type of water softener you’ve purchased. Using the owner’s manual, determine whether your softener targets a specific mineral or not.
If so, there are special cleaners to purchase to help with your particular unit. For example, if your softener targets iron, you’ll want a cleaner that gets rid of iron buildup.
As soon as you’ve found the perfect cleaner, you can continue onto the following steps.
Step 2: Feed the Cleaner
Next, you will want to make sure you pour a precise amount of cleaner into the brine tank. Typically, the product you choose will have instructions to follow, depending on tank size.
You’ll want to make sure you feed the correct amount of cleaner; otherwise, it might not sanitize effectively.
Alternatively, if you don’t have a brine tank on your softener, you can add the cleaner directly into the salt tank. However, make sure you do so while the salt is low.
Step 3: Switching to Regeneration
You’ll now want to inspect the outside of your water softener to find the control valve.
It’s time to turn the unit into its regeneration mode, which will force the system to regenerate the resin bed manually.
This is essential to cleaning, as it helps remove any excess dirt and debris within your water system.
It does this process by reversing the water flow while your cleaning solution is released into the mineral tank.
You’ll find that once regeneration has finished, the resin beads will be significantly cleaner.
It’s best if you’re able to do the regeneration process twice to help get rid of as much mineral buildup as possible.
Once finished, if you find mineral buildup, continue with regeneration for the third time.
Step 4: Return to Normal Settings
You’ll want to return the unit to standard settings on the same control panel that you used to engage regeneration.
During this time, it’s best to run the tap into your water softener for approximately 10 to 15 minutes. This will help to flush away any cleaner that could be remaining in the system.
Hands-On Cleaning Steps
If you prefer to take a more personalized approach to cleaning, you can do so with your hands.
As with the previous method, it’s highly recommended you wait until the salt content in your water softener is low.
Otherwise, you’ll find that it’s nearly impossible to remove the tank for cleaning.
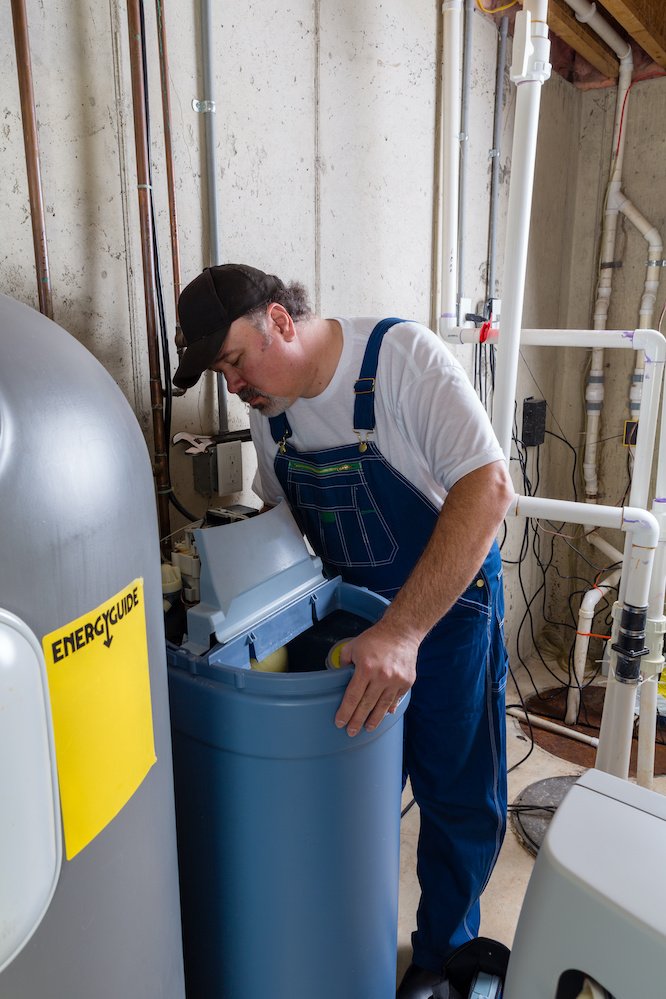
Step 1: Remove the Resin Tank
If your water softener comes with a resin tank, you’ll first want to unscrew the bolts and disconnect the unit from the valve.
Once you have the tank separated, you’ll want to make sure you remove any excess salt.
Step 2: Begin Cleaning
Using bleach and water, begin to clean the inside of the tank, paying particular attention to mineral buildup.
You might need to spend quite a while working away minerals, and you might need to use an abrasive sponge.
If you are unable to get rid of the minerals using bleach, you can opt for other store-bought cleaners designed for mineral removal.
Step 3: Rinse and Reinstall
Once finished cleaning, make sure you rinse the inside of the tank several times before reinstalling it. Remove any traces of bleach or cleaner before allowing the unit to regenerate.
Step 4: Add Salt and Regenerate
For the last stages of the hands-on method, you’ll need to add new salt to the unit and switch it to regeneration mode.
Doing this helps to push any additional minerals out of the system so that the softener can continue operating as usual.
Common Water Softener Maintenance
Apart from working to make sure your softener provides high-quality water throughout the year, there’s more maintenance.
Below, you’ll find some of the most common things you’ll need to do throughout your ownership. Also, you might be able to use these tips for troubleshooting.
Breaking Salt Bridges
As earlier mentioned, salt bridges can wreak havoc on your water softener. They can form unbeknownst to you, which is why checking the device every four to six weeks is essential.
One of the most significant issues with salt bridges, apart from lack of efficiency, is how it deceives the eye.
As there is a fixed crust that sits on top, the salt underneath could be getting used.
By quickly looking at the salt in your tank, it would look like the tank is full, when in fact, it could be almost empty.
You’ll likely have to spend some time breaking apart salt bridges using a broom handle or another heavy object.
Once you crack the bridge, make sure you break up the salt or remove it entirely and add new salt.
It’s important to note the amount of salt you’re putting into your softener in the future.
If you add too much salt, it could cause salt bridges to form quickly, so you’ll want to fill it at approximately two-thirds of the way.
Adjusting Softness
Although it might be tempting to push your water softener to its limits, it could negatively impact its performance.
One of the best maintenance tips to adjust the unit’s softness is to ensure it’s not overworking itself.
Over time, your water supply’s mineral content could change, which means your softening will change, too.
Fortunately, it can be simple to make adjustments with the help of the owner’s manual. There’s often a switch, lever, or dial that you can turn to change the softness level.
Knowing When to Reset
There could be instances when you’ll need to reset your water softener, primarily if it hasn’t been used for a while.
Whether you’ve recently returned from a vacation or have been in a power outage, you might want to consider it.
After a power outage, for example, the system might not recharge accurately, causing your water to return to its original hardness.
Like adjusting the softness, be sure to refer to the owner’s manual for reset instructions.
Conclusion
Knowing how to clean a water softener resin tank can help you to maintain your appliance and prolong its life.
By ensuring your home has access to continually softened water, you’ll be able to experience its best benefits.
Fortunately, the two methods of cleaning are quite simple, even for first-time users, to manage.